How to Build an AI-Powered Video Editor
AI-powered video editors are revolutionizing the world of content creation, enabling creators to automatically enhance and transform videos with minimal effort.
Sam
Creator or RVE
AI-powered video editors are revolutionizing the world of content creation, enabling creators to automatically enhance and transform videos with minimal effort. If you've been curious about how these advanced editors are built or are interested in building your own, this blog post will walk you through the key components, tools, and technology needed to create an AI-powered video editor.
Step 1: Understanding the Foundation – Video Rendering with Remotion
The first step in building any video editor, AI-powered or not, is to ensure you have the right foundation for video rendering. One of the most popular tools for this in the React ecosystem is Remotion. Remotion allows developers to leverage React for video creation and provides an excellent framework for building highly customizable video editing applications.
With Remotion, you can use React components to describe visuals, animations, and transitions. Its flexibility makes it a go-to choice for building video players and editors, offering frame-level control over videos.
import { Composition } from "remotion";
import { MyVideoComponent } from "./MyVideoComponent";

const MyVideoEditor = () => {
  return (
    <Composition
      id="MyVideo"
      component={MyVideoComponent}
      durationInFrames={500}
      fps={30}
      width={1920}
      height={1080}
    />
  );
};

export default MyVideoEditor;
This sets the stage for rendering videos, but you’ll need more to build a fully functioning AI-powered editor.
Step 2: Building the Video Editor Interface – Timeline, Clips, and Layers
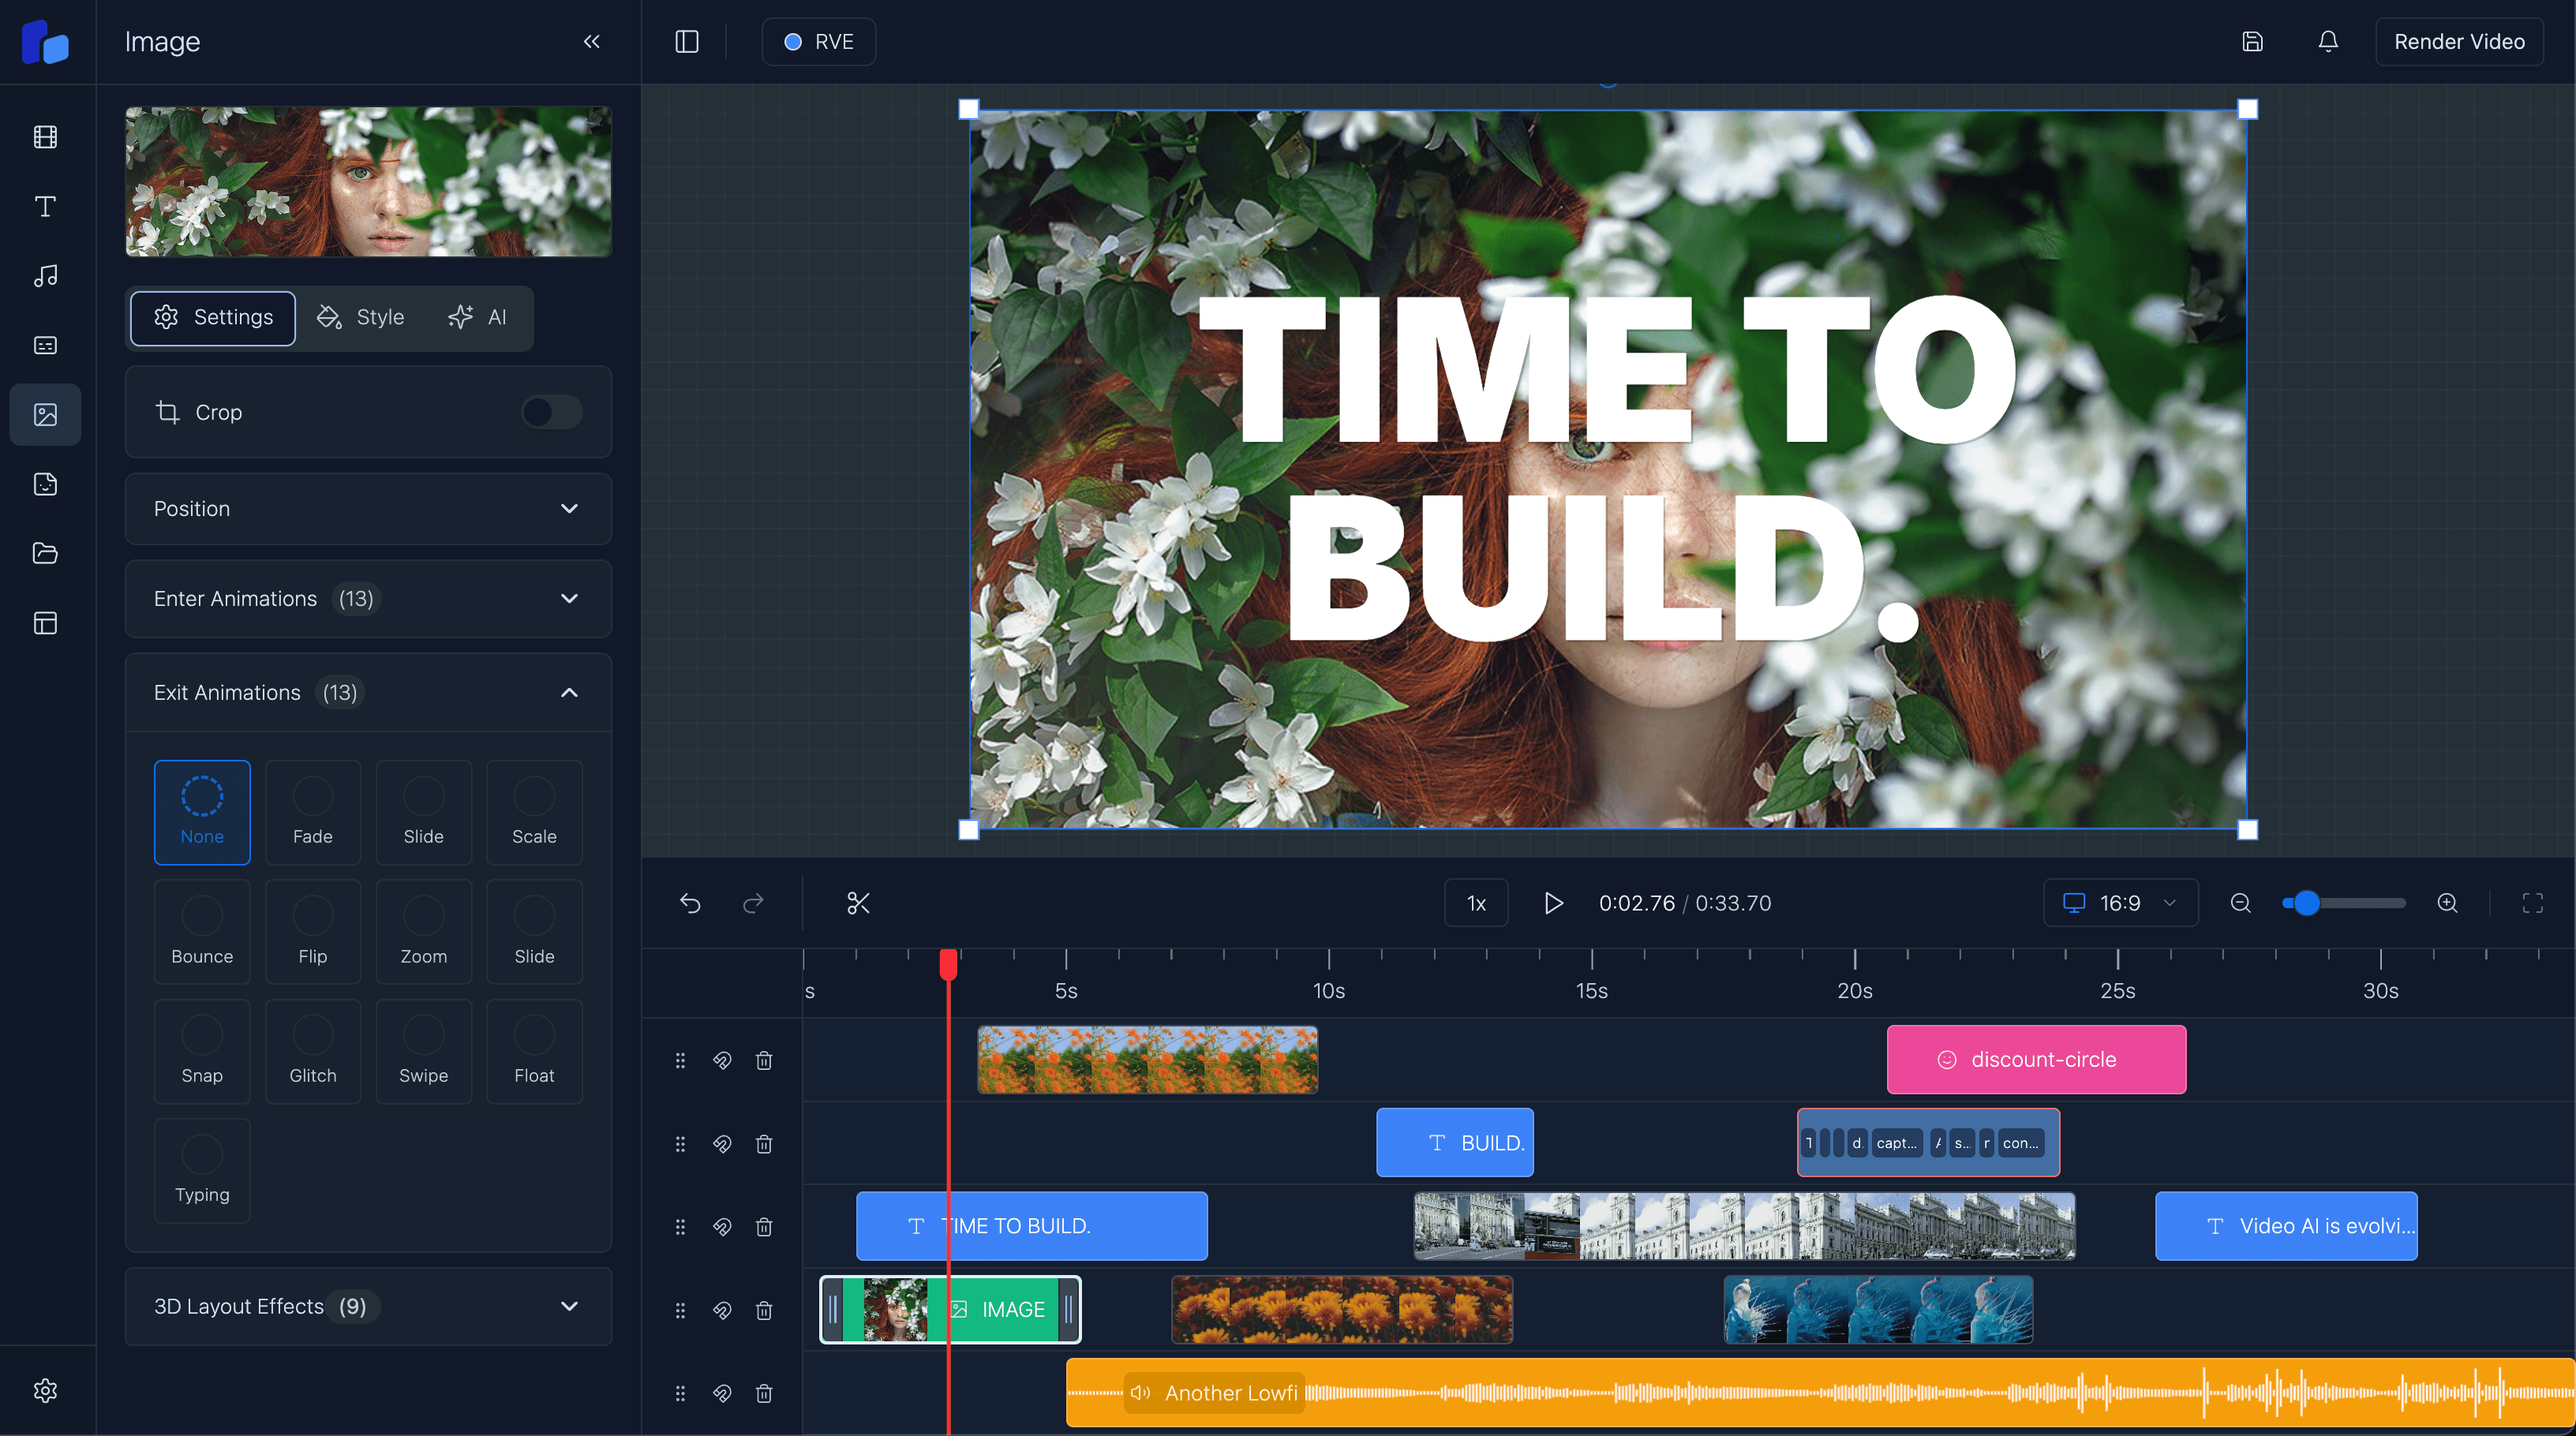
The next core component is creating the actual video editor interface. This usually involves designing a timeline where users can manipulate video clips, add effects, and synchronize audio. The timeline needs to be interactive, allowing users to drag and drop clips, trim sections, and rearrange elements.
To achieve this, you can use React for the interface, Remotion for video playback, and Tailwind CSS for styling.
import { useState } from "react";

const VideoTimeline = () => {
  const [clips, setClips] = useState([{ id: 1, name: "Clip 1", duration: 50 }]);

  const addClip = () => {
    setClips([
      ...clips,
      { id: clips.length + 1, name: `Clip ${clips.length + 1}`, duration: 50 },
    ]);
  };

  return (
    <div className="flex flex-col">
      <div className="timeline flex">
        {clips.map((clip) => (
          <div key={clip.id} className="clip bg-gray-300 p-2 m-2">
            {clip.name} ({clip.duration} frames)
          </div>
        ))}
      </div>
      <button onClick={addClip} className="mt-4 bg-blue-500 text-white p-2">
        Add Clip
      </button>
    </div>
  );
};

export default VideoTimeline;
With this, you have a basic timeline where video clips can be added and displayed. You can extend this further by incorporating features like:
- Clip trimming
- Layers for video and audio tracks
- Drag-and-drop functionality using libraries like
dnd-kit.
Step 3: Incorporating AI – Automating Video Editing Tasks
To truly make your video editor AI-powered, you'll need to incorporate machine learning algorithms that can automate specific tasks. Here are some popular AI features you can integrate:
-
Automatic Scene Detection: AI can detect scene changes and automatically cut or split the video at the right moments.
-
Auto-subtitle Generation: Using Whisper by OpenAI, you can transcribe audio and automatically add subtitles.
-
Content Summarization: You can use GPT-4 to summarize long-form content into key highlights.
-
Object Detection and Tracking: AI models like YOLO can identify and follow objects across video frames for precise effects.
Step 4: Adding Effects and Transitions
Once the basic editing is in place, AI can suggest transitions, apply filters, and improve color grading based on the video content. You can manually add effects with Remotion by creating custom animations.
Step 5: Final Touches – Exporting and Sharing
Finally, Remotion makes exporting videos as MP4 files straightforward, and you can also include AI to optimize for platform-specific formats. Tools like Revid automatically create short-form videos optimized for social media, reducing manual effort.
Conclusion: Build Your Own AI Video Editor with React, Remotion, and Tailwind CSS
AI-powered video editors are the future of content creation, and you can build one yourself with tools like React and Remotion. If you want a head start, check out React Video Editor Pro. We’ve done the hard part for you, so you can get straight to building amazing AI-powered video experiences.


