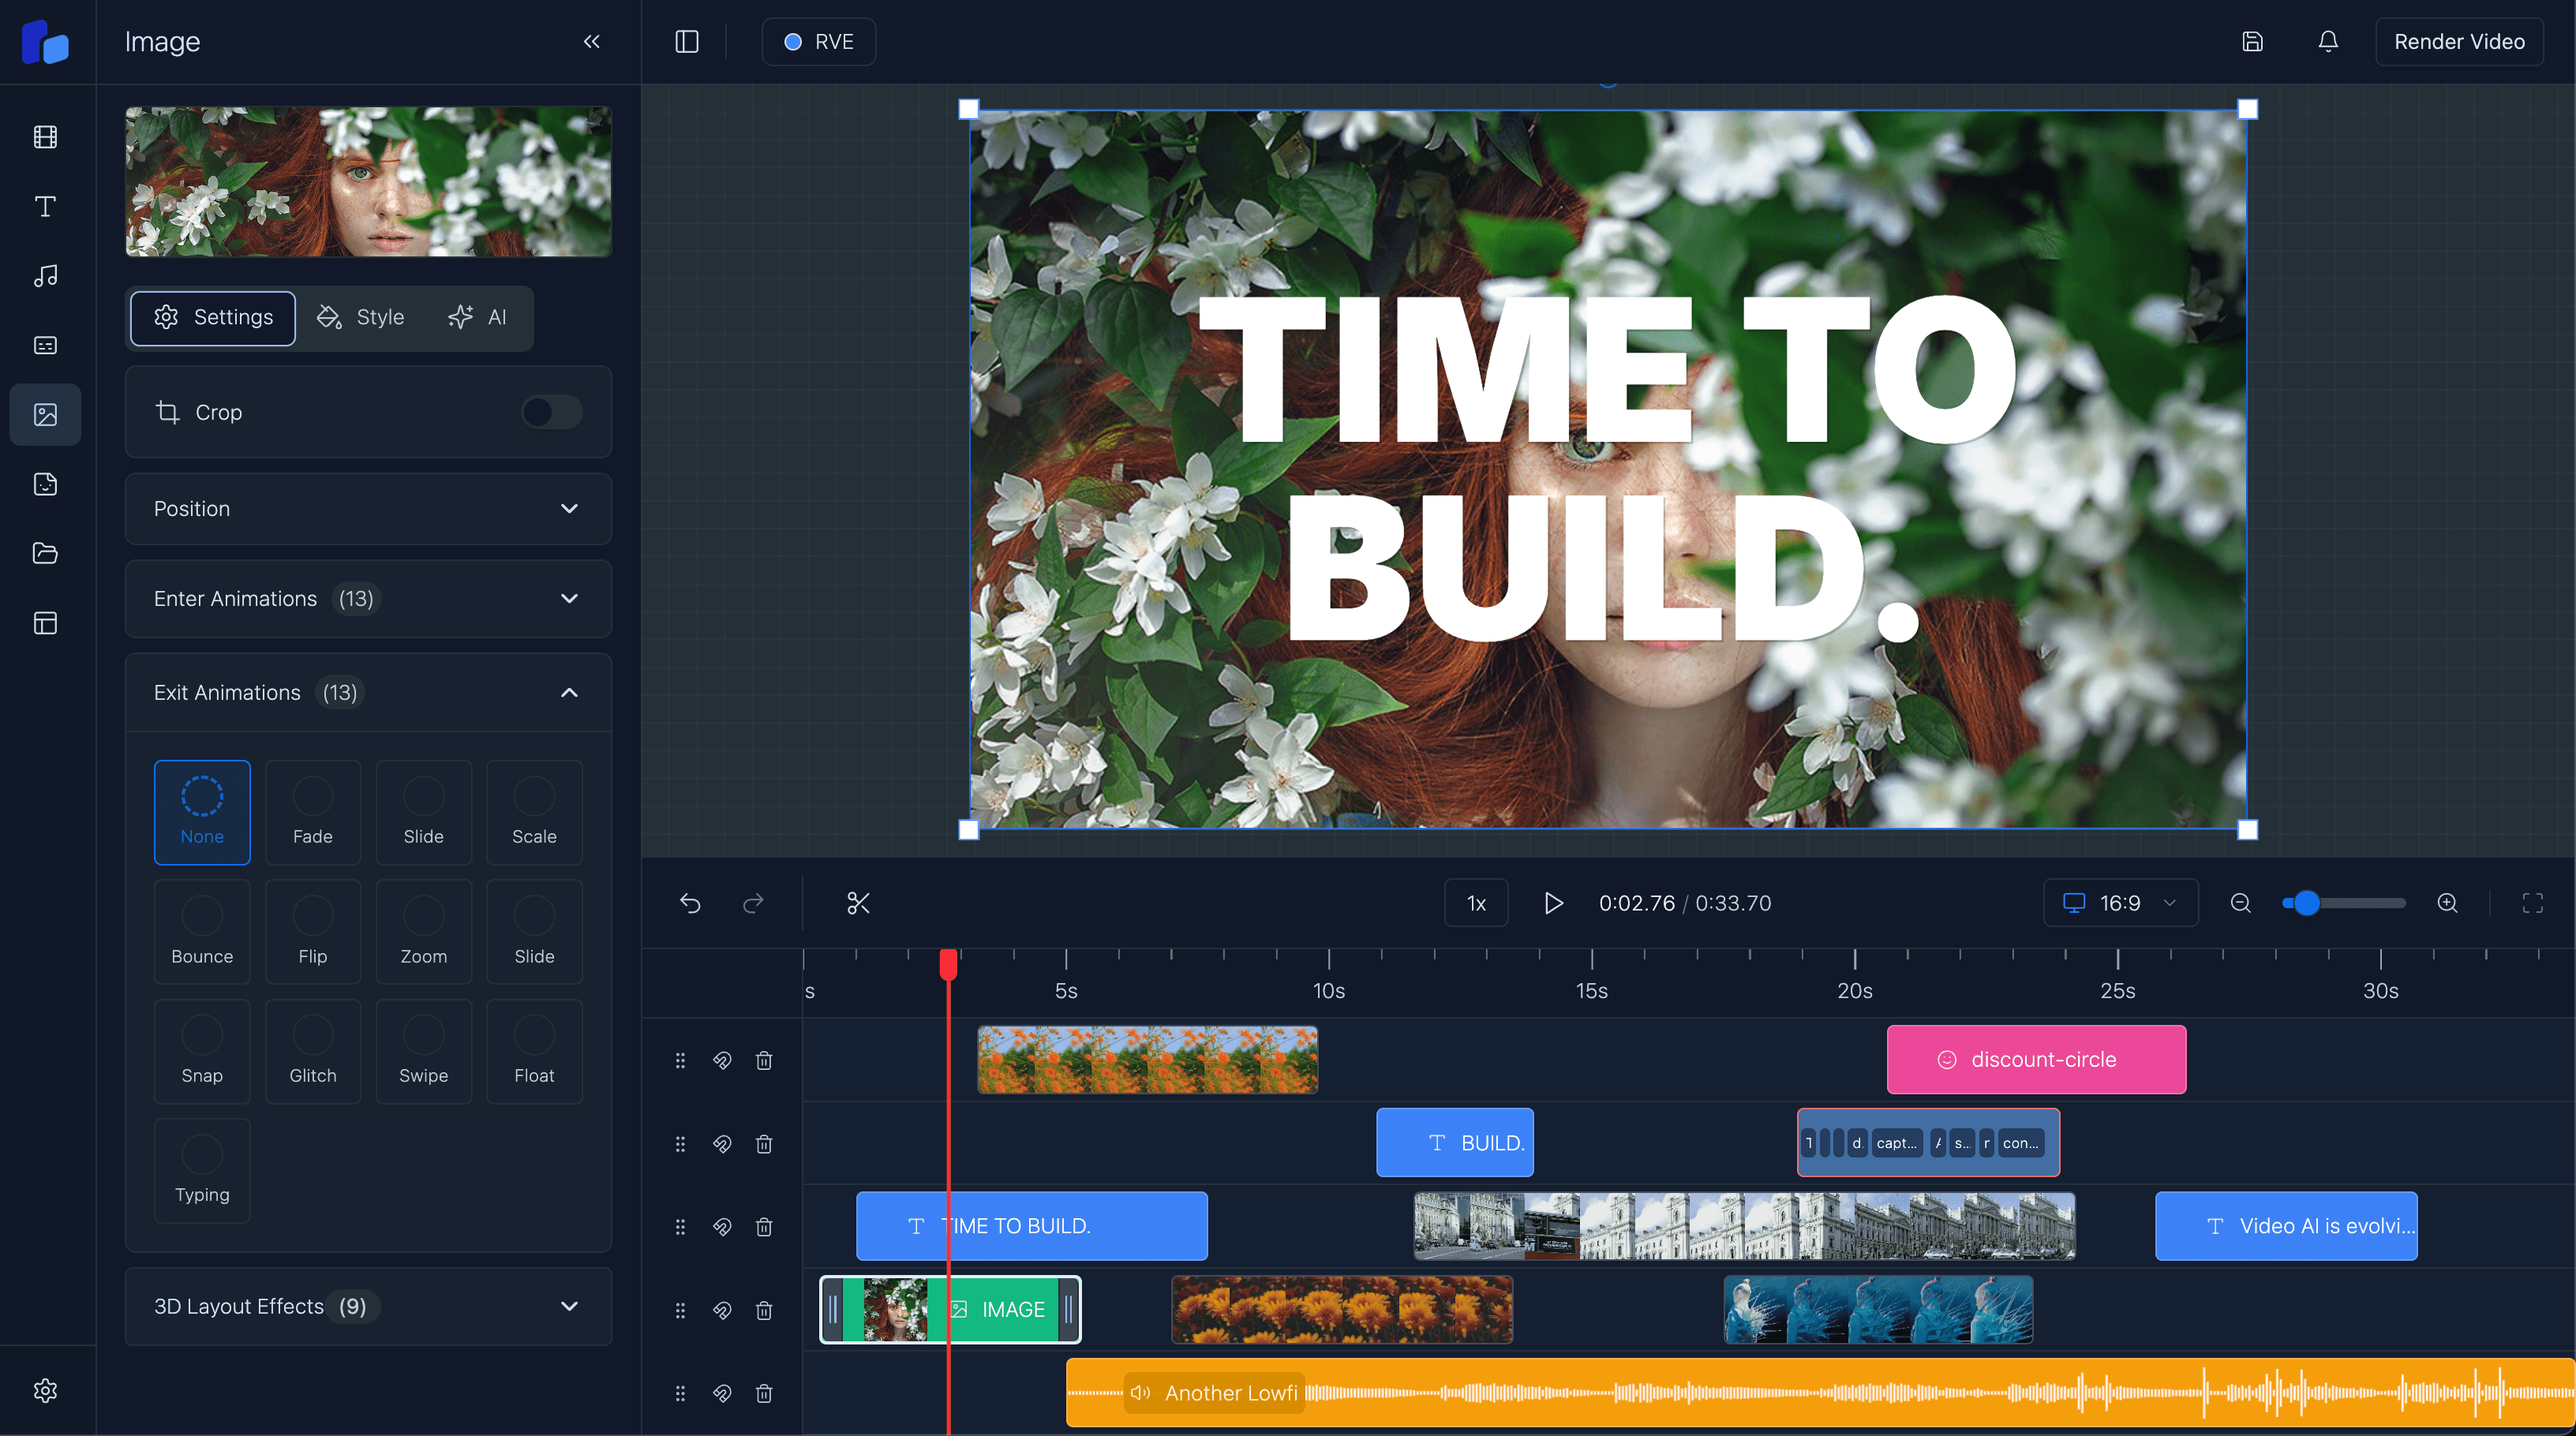
Video Rendering with Remotion & AWS Lambda
Explore how to set up Remotion Video rendering within a Next.js application, focusing on frontend configuration, composition setup, API communication, and AWS Lambda integration.
Sam
Creator or RVE
Introduction
In this post, we’ll explore how to set up Remotion rendering within a Next.js application, focusing on frontend configuration, composition setup, API communication, and AWS Lambda integration. By the end, you’ll understand each step, from initializing compositions to triggering a render and delivering the final video.
Prerequisites
Note: This guide assumes you’ve already completed your AWS Lambda setup for Remotion, have your AWS keys and Lambda function name ready, and can deploy your Remotion project as a site to AWS.
Why This Matters
Setting up AWS Lambda and deploying your Remotion project as a "site" creates the foundation for scalable video rendering. Here’s how it all fits together:
- AWS Lambda handles intensive rendering tasks by splitting your video into frames and processing each chunk in parallel. This setup is scalable, so you don’t need a dedicated server-Lambda simply responds to requests as they come in.
- Deploying Your Site for Lambda: When you deploy your Remotion project, it’s uploaded to an S3 bucket as a "site" that Lambda accesses for rendering. This deployment creates a Serve URL, which links Lambda with your compositions and assets.
- Updating Your Project: Each time you modify your compositions or adjust the structure, you’ll need to redeploy your site to ensure Lambda has the latest version. Reusing the same "site name" will update the existing Serve URL, while creating a new name generates a fresh link.
This setup allows Lambda to fetch and render your updated video configurations seamlessly. For a detailed guide on setting up Lambda and deploying a Remotion site, check out the Remotion Lambda Setup Guide..
Architecture Overview
Setting up Remotion rendering involves three primary components:
- Frontend: The Next.js app serves as the interface where users initiate rendering and preview the compositions. This acts as your video editor.
- API Routes: Next.js API routes handle render requests and progress polling. This layer bridges your frontend logic and AWS Lambda backend.
- AWS Lambda: Remotion on Lambda handles the heavy lifting of video rendering, managing frame generation, overlays, and video assembly.
Step 1: Setting Up the Frontend with Next.js and Remotion
To structure your Remotion setup within a Next.js application, it's good practice to follow a clear file structure with three main files: index.ts, main.tsx, and root.tsx. This setup keeps your configuration clean, with each file playing a distinct role in the rendering flow.
File Structure Overview
- index.ts: The entry point that initializes the Remotion root component, which contains all video compositions.
- main.tsx: Holds global settings for your composition, such as video dimensions, frame rate, and duration, ensuring a consistent base for rendering.
- root.tsx: Acts as the “canvas” for your video scenes and animations, organizing and rendering each composition.
Let’s break down each file in detail.
index.ts: The Entry Point
The index.ts file is crucial in Remotion projects. It serves as the entry point that tells Remotion where to start rendering by registering the main root component that holds all compositions. Remotion looks for this file as the entry point in TypeScript projects, much like Next.js uses an index route as a default entry.
// index.ts
import { registerRoot } from 'remotion';
import { RemotionRoot } from './root';

registerRoot(RemotionRoot);`;
In this code:
- registerRoot : Initializes the rendering process by linking to RemotionRoot, which contains all video compositions.
- RemotionRoot : Acts as a container for all compositions, providing a single starting point for rendering.
This setup provides a consistent structure for Remotion, making it easy to scale and manage compositions.
main.tsx: Configuring Composition Settings
main.tsx typically contains global settings that define essential video properties like resolution, frame rate, and duration. This file ensures that these parameters remain consistent across your compositions.
// main.tsx
import { Composition } from 'remotion';
import MyComposition from './MyComposition';

const Main = () => (
<>
<Composition
      id="MainVideo"
      component={MyComposition}
      durationInFrames={300}
      fps={30}
      width={1920}
      height={1080}
    />
</>
);

export default Main;`;
In this example:
- Composition : Each
<Composition />component represents a video setup, specifying parameters like ID, duration, frame rate (fps), width, and height. - Consistency : These values are set and do not change, ensuring all renders follow the same base configuration.
This consistency simplifies editing and exporting, as the same settings apply to all video renders.
root.tsx: Organizing and Rendering Compositions
The root.tsx file renders each composition on a "canvas" for Remotion. This file gathers all compositions in one place, allowing users to preview and render various scenes and transitions in a unified interface.
// root.tsx
import { Composition } from "remotion";
import Main from "./main";

// Note: For simpler projects, you could combine this with main.tsx into a single component
export const RemotionRoot = () => (
  <>
    <Main />
  </>
);
In this example:
- RemotionRoot: Organizes all compositions within the project. It serves as the main container where Remotion looks for the video structures to render.
- Main Component Inclusion: By including Main here, you render the entire composition setup configured in main.tsx making all settings and previews accessible in a single view.
Deploying to S3 with remotion lambda sites create
Once you’ve set up index.ts, main.tsx, and root.tsx, you’re ready to deploy this configuration to AWS as a static site. This deployment enables AWS Lambda to access your compositions and assets directly from S3, allowing for efficient rendering.
To deploy, use the following command:
npx remotion lambda sites create src/index.ts --site-name=my-video- --site-name : Specifies a unique name for your project deployment. It creates a Serve URL on S3, which AWS Lambda uses to access your project’s assets.
- src/index.ts : The entry point file (index.ts) initializes Remotion with the root component and tells Lambda where to start rendering.
The Serve URL created here links directly to your Remotion setup on S3. AWS Lambda uses this URL for each render request, dynamically fetching assets and compositions, so any updates made to your project can be seamlessly deployed by re-running this command. This deployment step ensures Lambda has direct access to your most recent configurations, compositions, and assets for efficient video rendering.
Step 2: Configuring the API to Handle Render Requests
The API route in Next.js plays a crucial role in managing render requests and connecting the frontend to AWS Lambda for rendering. Here, we’ll set up the /api/lambda/render endpoint to initiate a render request and configure it to validate AWS credentials, centralize configuration, and log request details for better debugging.
Render Initiation API
This route handles the render requests by accepting specific parameters and sending them to AWS Lambda. To ensure stability and clear debugging, we’ll include a centralized configuration for Lambda settings, AWS credential validation, and logging.
Here’s the setup for /api/lambda/render:
// /api/lambda/render.ts
import { AwsRegion, RenderMediaOnLambdaOutput } from "@remotion/lambda/client";
import { renderMediaOnLambda } from "@remotion/lambda/client";
import { RenderRequest } from "@/components/editor/types";
import { executeApi } from "@/components/editor/api-response";
import { LAMBDA_FUNCTION_NAME, SITE_NAME, REGION } from "@/constants";

/**
 * Configuration for the Lambda render function
 */
const LAMBDA_CONFIG = {
  FUNCTION_NAME: LAMBDA_FUNCTION_NAME,
  FRAMES_PER_LAMBDA: 100,
  MAX_RETRIES: 2,
  CODEC: "h264" as const,
} as const;

/**
 * Validates AWS credentials are present in environment variables
 * @throws {TypeError} If AWS credentials are missing
 */
const validateAwsCredentials = () => {
  if (
    !process.env.AWS_ACCESS_KEY_ID &&
    !process.env.REMOTION_AWS_ACCESS_KEY_ID
  ) {
    throw new TypeError(
      "Set up Remotion Lambda to render videos. See the README.md for setup details."
    );
  }
  if (
    !process.env.AWS_SECRET_ACCESS_KEY &&
    !process.env.REMOTION_AWS_SECRET_ACCESS_KEY
  ) {
    throw new TypeError(
      "The environment variable REMOTION_AWS_SECRET_ACCESS_KEY is missing. Add it to your .env file."
    );
  }
};

/**
 * POST endpoint handler for rendering media using Remotion Lambda
 * @description Handles video rendering requests by delegating to AWS Lambda
 * @throws {Error} If rendering fails or AWS credentials are invalid
 */
export const POST = executeApi<RenderMediaOnLambdaOutput, typeof RenderRequest>(
  RenderRequest,
  async (req, body) => {
    // Debug logging
    console.log("Received body:", JSON.stringify(body, null, 2));
    console.log("inputProps:", JSON.stringify(body.inputProps, null, 2));

    // Validate AWS credentials
    validateAwsCredentials();

    try {
      const result = await renderMediaOnLambda({
        codec: LAMBDA_CONFIG.CODEC,
        functionName: LAMBDA_CONFIG.FUNCTION_NAME,
        region: REGION as AwsRegion,
        serveUrl: SITE_NAME,
        composition: body.id,
        inputProps: body.inputProps,
        framesPerLambda: LAMBDA_CONFIG.FRAMES_PER_LAMBDA,
        downloadBehavior: {
          type: "download",
          fileName: "video.mp4",
        },
        maxRetries: LAMBDA_CONFIG.MAX_RETRIES,
      });

      console.log("Render result:", JSON.stringify(result, null, 2));
      return result;
    } catch (error) {
      console.error("Error in renderMediaOnLambda:", error);
      throw error;
    }
  }
);
Breaking Down the Key Components
1. Centralized Configuration with LAMBDA_CONFIG
The LAMBDA_CONFIG object stores key settings for AWS Lambda, including:
- FUNCTION_NAME: The name of the Lambda function.
- FRAMES_PER_LAMBDA: Specifies the number of frames each Lambda invocation handles, which optimizes processing speed.
- MAX_RETRIES: Sets the maximum retry attempts in case of failure.
- CODEC: The video codec to be used, such as "h264" for compatibility.
By centralizing these settings, we can easily update Lambda configurations in one place, improving maintainability and reducing errors.
2. Validating AWS Credentials
To ensure smooth operations, the validateAwsCredentials function checks that the required AWS credentials are present in environment variables. This step helps avoid runtime errors due to missing credentials, alerting us early if credentials are missing or improperly set.
3. Handling Render Requests with renderMediaOnLambda
The renderMediaOnLambda function initiates the actual rendering process on AWS Lambda, using the centralized configuration and request body parameters:
- serveUrl: Specifies the URL where Remotion assets are hosted.
- composition: The unique ID of the composition to render.
- inputProps: Custom properties for the video, such as text and color inputs.
- downloadBehavior: Configures the download behavior to specify the file name of the rendered video.
- everyNthFrame: Controls the frame interval for rendering, defaulting to every frame.
Upon successful rendering, the API returns the result object, which contains details like the renderId, allowing the frontend to track progress and download the completed video.
Example Request Payload for Initiating Rendering
When sending a render request to this endpoint, the payload might look like:
{
  "id": "MainVideo",
  "inputProps": {
    "title": "Welcome to My Video",
    "backgroundColor": "#FF5733",
    "fontSize": 24
  }
}
In this payload:
- id: The ID of the composition to render (must match the ID defined in root.tsx).
- inputProps: Custom properties passed to the composition, allowing dynamic customization for each render.
Step 3: Polling for Render Progress
After initiating the rendering process, we will want to keep users informed about the render’s status, especially since video rendering can be a time-intensive task. To accomplish this, we’ll use an API route that periodically checks the render status on AWS Lambda, updating the frontend with the current progress.
Progress API
The /api/lambda/progress API endpoint is responsible for checking the status of a rendering job on AWS Lambda. It does this by polling the Remotion Lambda function associated with the render, which returns data about the render’s progress, any errors encountered, and the final video output link if the render is complete.
The POST handler for the progress endpoint uses the getRenderProgress function from the Remotion Lambda client, fetching real-time updates from the Lambda function.
Example Code for /api/lambda/progress
import { AwsRegion, getRenderProgress } from "@remotion/lambda/client";
import { ProgressRequest, ProgressResponse } from "@/types"; // Moved to a more general path
import { executeApi } from "@/utils/api-response"; // Moved to a common utility path
import { LAMBDA_FUNCTION_NAME, REGION } from "@/config/constants"; // Centralized constants

/**
 * API endpoint to check the progress of a Remotion video render on AWS Lambda
 *
 * @route POST /api/lambda/progress
 * @returns {ProgressResponse} The current status of the render
 *   - type: 'error' - If a fatal error occurred during rendering
 *   - type: 'done' - If rendering is complete, includes output URL and file size
 *   - type: 'progress' - If rendering is in progress, includes completion percentage
 */
export const POST = executeApi<ProgressResponse, typeof ProgressRequest>(
  ProgressRequest,
  async (req, body) => {
    console.log("Progress request received", { body });
    const renderProgress = await getRenderProgress({
      bucketName: body.bucketName,
      functionName: process.env.LAMBDA_FUNCTION_NAME || LAMBDA_FUNCTION_NAME,
      region: (process.env.AWS_REGION || REGION) as AwsRegion,
      renderId: body.id,
    });

    if (renderProgress.fatalErrorEncountered) {
      return {
        type: "error",
        message: renderProgress.errors?.[0]?.message ?? "Unknown error",
      };
    }

    if (renderProgress.done) {
      return {
        type: "done",
        url: renderProgress.outputFile as string,
        size: renderProgress.outputSizeInBytes as number,
      };
    }

    return {
      type: "progress",
      progress: Math.max(0.03, renderProgress.overallProgress),
    };
  }
);
Breaking Down the Key Components
1. Fetching Render Progress
The getRenderProgress function is called with the necessary parameters: bucketName, functionName, region, and renderId. This function interacts with AWS Lambda to retrieve the current rendering status, including:
- fatalErrorEncountered: Indicates if any fatal error occurred during rendering
- done: A boolean that becomes
truewhen the rendering is complete - overallProgress: A number between 0 and 1 representing the completion percentage of the rendering job
- outputFile: If rendering is complete, this contains the URL for downloading the finished video
2. Handling Different Progress States
The endpoint handles three distinct states:
- Error State: If fatalErrorEncountered is true, an error message is returned to the frontend, allowing it to display an error message to the user
- Done State: When
doneistrue, the endpoint returns the video's download URL (outputFile) and file size, signaling that the rendering has completed - Progress State: If the rendering is still in progress, the endpoint returns a
progressresponse, which contains a percentage (calculated asMath.max(0.03, renderProgress.overallProgress)). This ensures a minimum progress value is displayed, even if Lambda is just initializing
Example Request Payload
Here’s an example payload to poll for render progress:
{
  "id": "render12345",
  "bucketName": "my-remotion-renders"
}
In this payload:
- id: The unique render ID to track progress.
- bucketName: The S3 bucket where Remotion stores the rendered output files.
Step 5: Delivering the Final Video
Once AWS Lambda completes rendering, the final video is stored in an S3 bucket. The progress endpoint provides a download link for the final video, allowing users to easily access the completed render.
Common Issues and Troubleshooting Tips: Even with a streamlined setup, certain errors or issues may arise during the Remotion rendering process. Here are some common challenges you might encounter and ways to troubleshoot them:
1. Memory Allocation Errors 😢
- Error: AWS Lambda returns an error indicating insufficient memory.
- Solution: Increase the memory allocation for your Lambda function. Video rendering can be memory-intensive, and starting with at least 2048MB is recommended. You may also consider increasing the Lambda timeout if renders are timing out before completion.
2. Missing AWS Credentials 😢
- Error: Render requests fail due to missing AWS credentials.
- Solution: Ensure your
.envfile includes the correctAWS_ACCESS_KEY_IDandAWS_SECRET_ACCESS_KEYvalues. You can validate credentials using thevalidateAwsCredentialsfunction to catch issues early.
3. Outdated Compositions 😢
- Error: Your render doesn’t reflect recent changes to the composition or video assets.
- Solution: Redeploy your Remotion site using
npx remotion lambda sites create. If you’re using an existing site name, re-deploying updates the Serve URL with the latest version. Always redeploy after making updates to ensure the latest changes are applied.
4. Lambda Function Limits 😢
- Error: Lambda function fails or hangs if the render exceeds execution limits.
- Solution: Increase the
FRAMES_PER_LAMBDAsetting in your configuration to reduce the workload per invocation. This can help if renders are getting interrupted due to Lambda’s execution limits. Alternatively, you may need to break up the render into smaller chunks for complex videos.
5. Asset Loading Errors 😢
- Error: Render fails due to assets not being accessible (e.g., fonts, images).
- Solution: Ensure all assets are correctly uploaded to the S3 bucket referenced by your Serve URL. Double-check that the assets are accessible and properly referenced in your composition.
6. Lambda Function Not Triggered 😢
- Error: Render requests do not trigger the Lambda function as expected.
- Solution: Check that the function name in your configuration matches the deployed Lambda function’s name. If you’re deploying in a specific region, verify that the
REGIONsetting aligns with the Lambda function’s region.
Conclusion
I hope this guide gave you some valuable insights! Video rendering can definitely be a tricky process, but with this serverless setup, you should be well on your way to bringing your video projects to life. AWS Lambda and Remotion make a powerful team, giving you the flexibility to scale without needing to worry about server maintenance. If you’re just starting out, remember to take it step-by-step-you’ve got this! Happy rendering, and I can’t wait to see what you create.
